Why do I need these programs?
Putty makes secure connection to indy22.fzu.cz. X-win32 displays the window of
Conquest or Quest. This is emulation of UNIX graphics for Windows. WinSCP can be used for downloading
files from indy22.fzu.cz to your PC.
Step-by-step instructions
Start X-win32 (its icon is blue X). A blue
X in the system tray will indicate X-win32 is running.
At the first start the program wants to create a user session. However, any session of X-win32 cannot be used
for secure connection. Type in whatsoever and save it as a session. Start program Xconfig
(its icon is red X, it is accessible through Start -> Programs ... ).
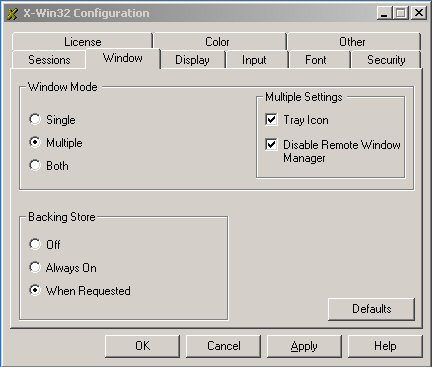
Define properties of Window according to this figure:
This is the startup screen. Define the server (indy22.fzu.cz) and protocol (SSH)

Define the startup command and SSH protocol version 2.
The Echo command shows the display settings for diagnostic purposes.
The usage of bash guarantees that the path to conquest is known and the user
environment is properly initiated.
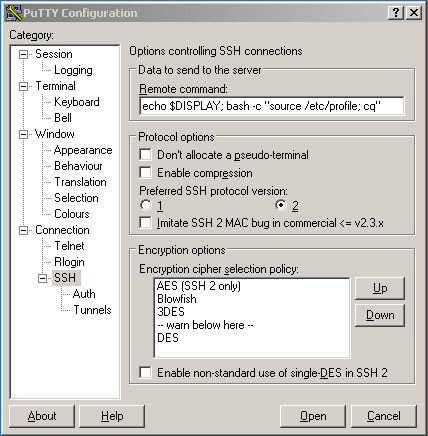
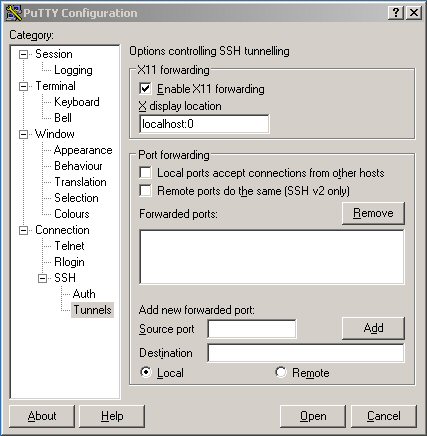
Enable X11 forwarding.
Go back to the first screen, name your session in the "Saved sessions" text box
and press Save. The next time the session can be started by double-click
on its name in the list.
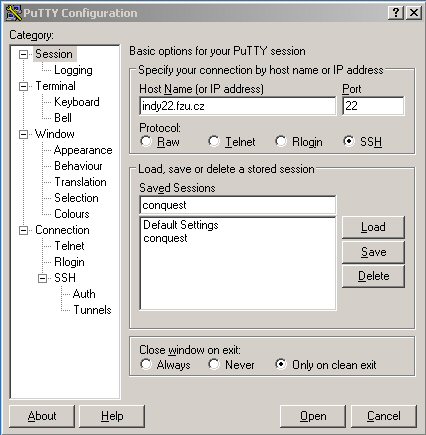
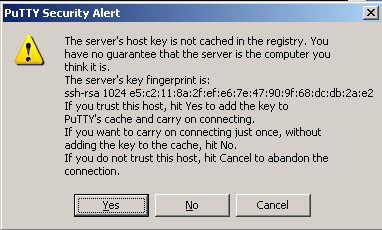
Start Putty, double-click the name of the session (conquest). At the first connection
Putty shows this warning, press Yes.
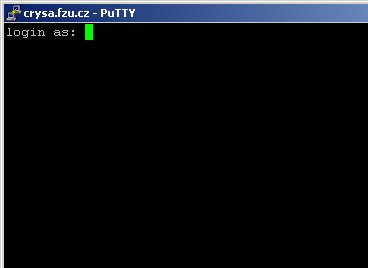
Type your username and (later on) your password.
Your session has been successfully started.
"localhost:10.0" is address of the secure display. This is assigned automatically by SSH.
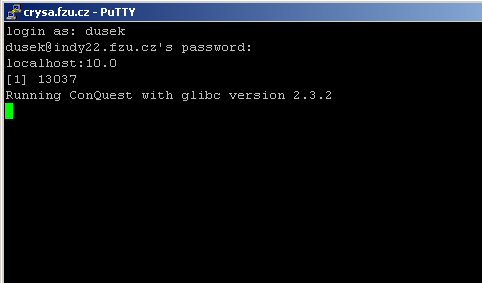
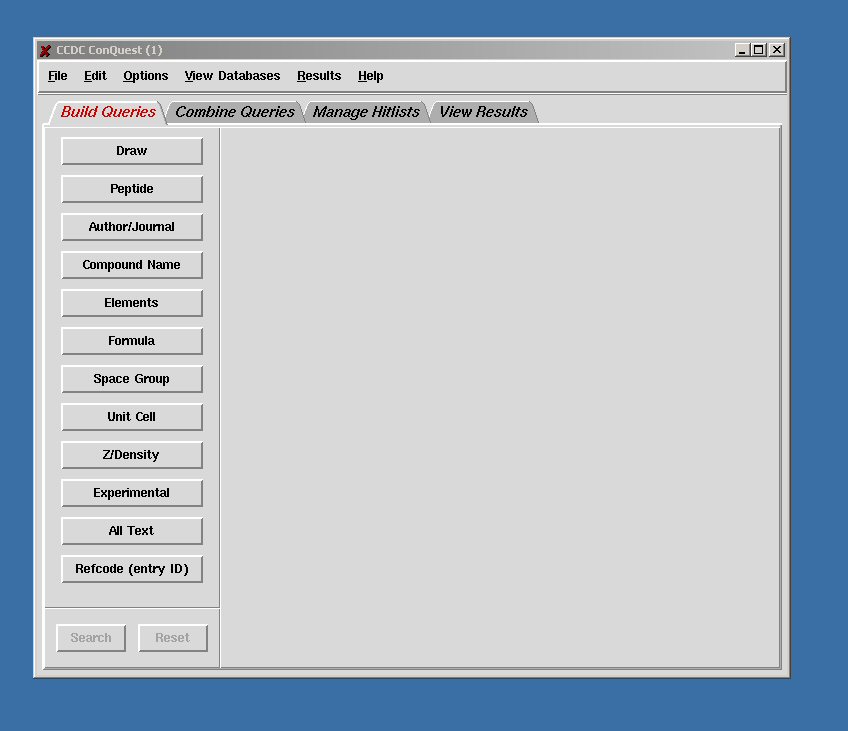
After 10 seconds delay Conquest window should appear in the Windows environment.
After searching the database close the Conquest window and it will automatically
close the Putty window.
Conquest stores the search results in indy22.fzu.cz. The files in your user space are accessible by scp (secure copy) command that is called pscp.exe in the Putty installation. The syntax of scp command is not very friendly, fortunately there are many easy to use interfaces for Windows, for instance WinSCP.
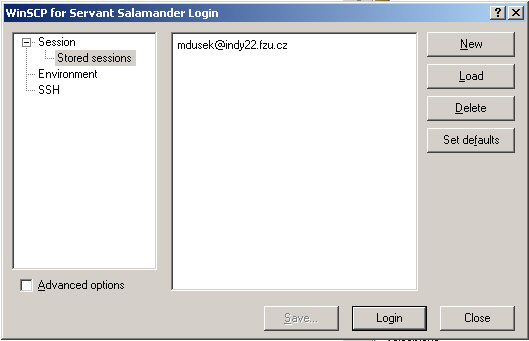
This is the startup screen of WinSCP. Stored sessions can be started by Login button.
This is session configuration window of WinSCP. It appears after pressing
New or Load.

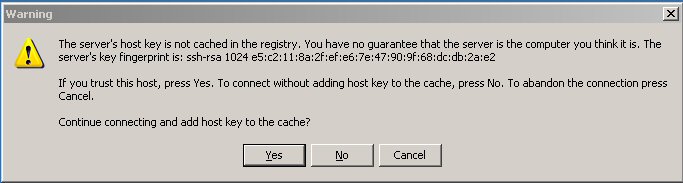
During the first connection WinSCP shows this warning, press Yes.
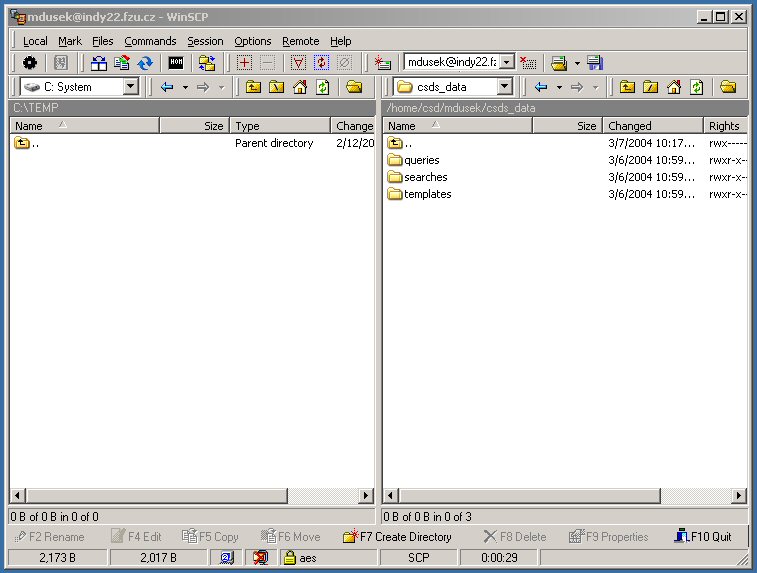
This is WinSCP window with succesfully started session. The left panel is
the local PC, the right panel shows the files in indy22.fzu.cz. The files can be
copied between panels using arrow buttons in the upper toolbar or by
pressing F5 (Norton commander style).
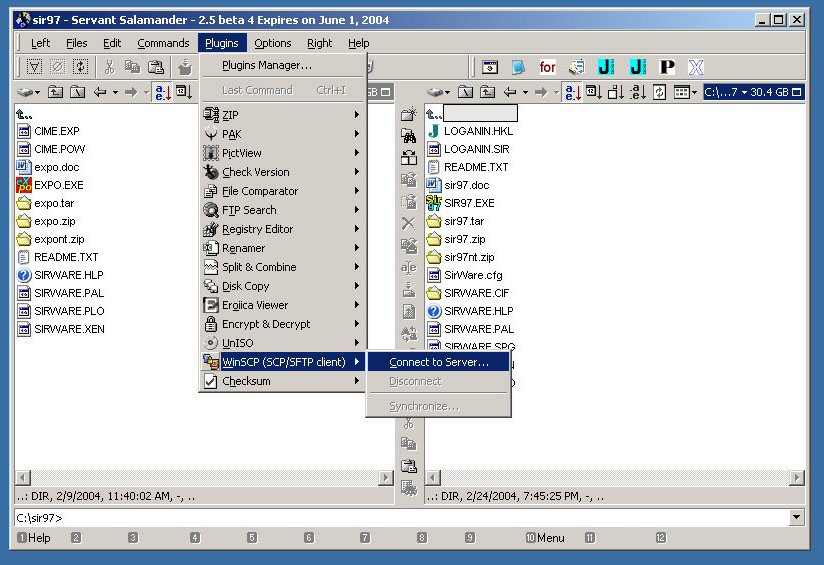
WinSCP is also used by beta version of Servant Salamander
as a plugin. This window shows how to start WinSCP within Servant Salamander
WinSCP has been successfully started as a plugin of Servant Salamander. Again, the local PC is
on the left, indy22.fzu.cz on the right.